Managing more than a handful of Proxmox hosts or other systems? Deploying API credentials and scripts to every individual server quickly becomes a maintenance burden — credentials expire, scripts need updating, and troubleshooting send failures means logging into each system separately. Consider setting up a centralized Postfix API relay instead. One relay, one set of credentials, and every system on your network just sends standard SMTP to it.
How it works
A default Proxmox installation sends notification emails to the local root user via Postfix. Normally this requires an SMTP relay to reach an external mailbox — which is increasingly difficult with modern OAuth-only providers like Microsoft 365 and Google Workspace.
This guide replaces the SMTP relay with a local Postfix alias that pipes mail into a lightweight Python script. The script authenticates directly to your cloud provider's API and delivers the message — no SMTP involved.
Proxmox notification
  → sendmail (root)
  → Postfix local alias
  → /usr/local/sbin/proxmox-mail-api
  → Microsoft Graph API  or  Amazon SES
→ your mailboxThe only Proxmox-side requirement is that the root@pam user has an email address set. Everything else happens at the Postfix and script level on the host — no new notification endpoints, no SMTP relays, no additional Proxmox UI settings.
A default Proxmox installation only has a root user, so all commands below assume you are logged in as root. This guide intentionally targets a default setup — the most common scenario we see in practice. If you know what you are doing, many of these steps can be customized to your preferences.
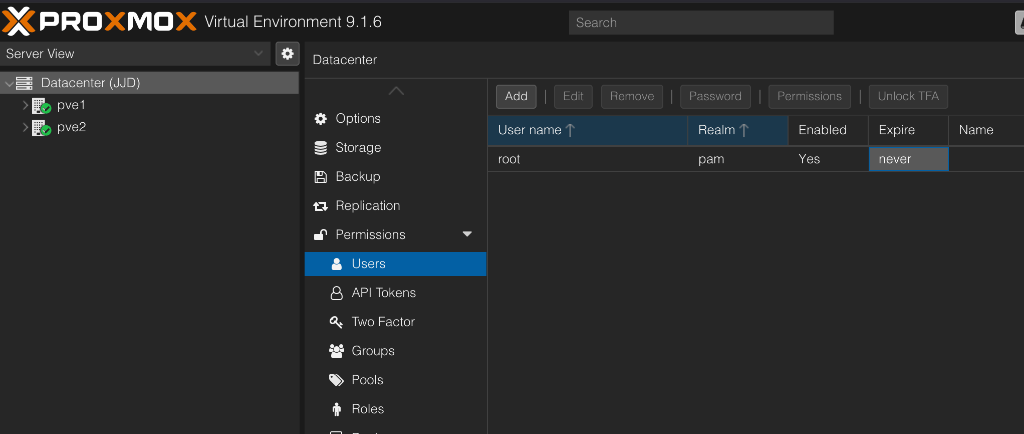
1. Verify the root@pam email
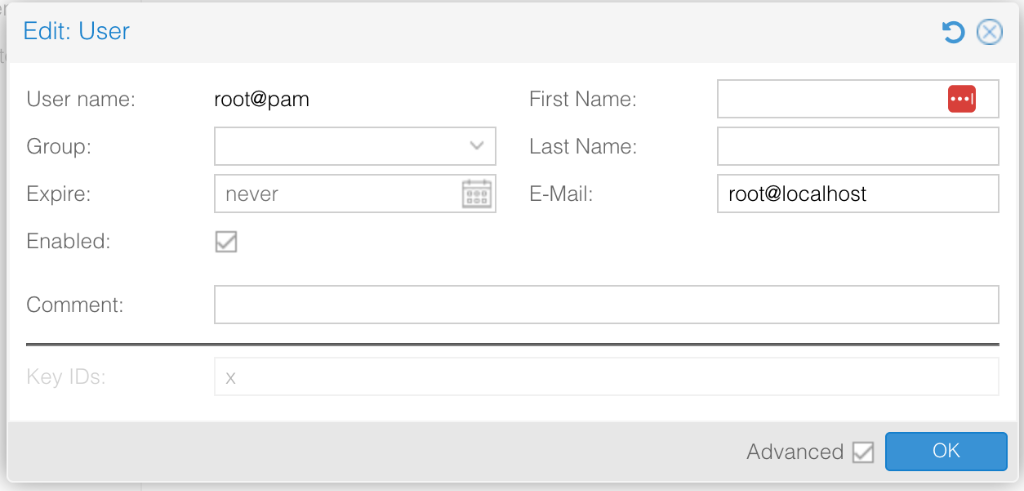
Proxmox will only send notifications if the root@pam user has an email address configured. Navigate to Datacenter → Permissions → Users, select root, and click Edit:
Set the E-Mail field to root@localhost. This routes the notification back into local Postfix delivery so the root alias (configured in a later step) can pipe it into the script. The actual destination mailbox is controlled by MAIL_TO in the script's config file.
Do not add addresses to the Additional Recipient(s) field in the mail-to-root sendmail endpoint. Those addresses bypass the script entirely and go through Postfix SMTP — which will fail without a relay. To send notifications to multiple people, list all addresses in MAIL_TO in the config file (space-separated).
2. Obtain API credentials
Before starting, gather the credentials for your chosen provider.
Microsoft Graph API
You need an Entra ID (Azure AD) App Registration with the Mail.Send application permission granted and admin-consented. Collect:
| Variable | Description |
|---|---|
GRAPH_TENANT_ID | Your Microsoft 365 tenant ID |
GRAPH_CLIENT_ID | The App Registration's Application (client) ID |
GRAPH_CLIENT_SECRET | A client secret generated for the App Registration |
GRAPH_SENDER | The mailbox the Graph API will send from (e.g. alerts@yourdomain.com) |
Amazon SES
You need IAM credentials with ses:SendEmail permission. Collect:
| Variable | Description |
|---|---|
SES_REGION | AWS region for SES (e.g. us-east-1) |
SES_ACCESS_KEY_ID | IAM access key ID |
SES_SECRET_ACCESS_KEY | IAM secret access key |
SES_SESSION_TOKEN | (Optional) Session token if using temporary credentials |
SES_SENDER | Verified sender address in SES |
Using Amazon SES? You will also need the boto3 Python library. Install it from the Debian repository:
apt install -y python3-boto33. Create the config file
Create /etc/default/proxmox-mail-api with your provider credentials. Choose the block that matches your provider.
Microsoft Graph API
cat > /etc/default/proxmox-mail-api <<'EOF'
MAIL_PROVIDER=graph
MAIL_TO=you@yourdomain.com
CREDENTIAL_EXPIRES=2028-03-31

GRAPH_TENANT_ID=xxxxxxxx-xxxx-xxxx-xxxx-xxxxxxxxxxxx
GRAPH_CLIENT_ID=xxxxxxxx-xxxx-xxxx-xxxx-xxxxxxxxxxxx
GRAPH_CLIENT_SECRET=your-secret-here
GRAPH_SENDER=proxmox-alerts@yourdomain.com
EOF
Amazon SES
cat > /etc/default/proxmox-mail-api <<'EOF'
MAIL_PROVIDER=ses
MAIL_TO=you@yourdomain.com
CREDENTIAL_EXPIRES=2028-03-31

SES_REGION=us-east-1
SES_ACCESS_KEY_ID=AKIAIOSFODNN7EXAMPLE
SES_SECRET_ACCESS_KEY=your-secret-key-here
SES_SENDER=proxmox-alerts@yourdomain.com
EOF
Lock down permissions
chmod 644 /etc/default/proxmox-mail-apiThe file must be readable by the Postfix pipe user (nobody), so 0644 is the standard permission for /etc/default/ on Debian. The script will refuse to run if the file is group- or world-writable. On a Proxmox host, only root has shell access by default.
MAIL_TO is where your notifications actually end up — this can be a single address or multiple addresses separated by spaces. The root@localhost email on root@pam is just a routing trick to keep mail local; it is not the destination.
/etc/default/ is the standard Debian location for service configuration files — equivalent to /etc/sysconfig/ on RHEL/Fedora.
4. Install the mail script
Download the proxmox-mail-api Python script to /usr/local/sbin/:
curl -fsSL -o /usr/local/sbin/proxmox-mail-api https://meikakuconsulting.com/guides/proxmox/proxmox-mail-api
chmod 755 /usr/local/sbin/proxmox-mail-api
Verify the script compiles
python3 -m py_compile /usr/local/sbin/proxmox-mail-apiIf this command produces no output, the script is syntactically valid.
The Graph provider uses only Python 3 standard library modules — no additional packages required. Proxmox ships with Python 3 out of the box. The SES provider additionally requires python3-boto3 from the Debian repository.
5. Set the Postfix alias
Add a root alias that pipes all local mail into the script. This command is idempotent — it replaces an existing root: line if present, or appends one if not:
grep -q '^root:' /etc/aliases \
  && sed -i 's|^root:.*|root: "|/usr/local/sbin/proxmox-mail-api"|' /etc/aliases \
  || echo 'root: "|/usr/local/sbin/proxmox-mail-api"' >> /etc/aliases

newaliasesThis intercepts all local mail to root on this host — including cron job output and other system notifications. On a Proxmox host, this is usually exactly what you want.
6. Remove the SMTP relay (if configured)
If Postfix is currently configured with a relay host, clear it so mail stays local:
postconf -e relayhost=
systemctl restart postfix
You can verify it is cleared:
postconf relayhostThe output should show relayhost = with no value.
7. Test
The easiest way to test is directly from the Proxmox web UI. Navigate to Datacenter → Notifications, select the mail-to-root target, and click Test:
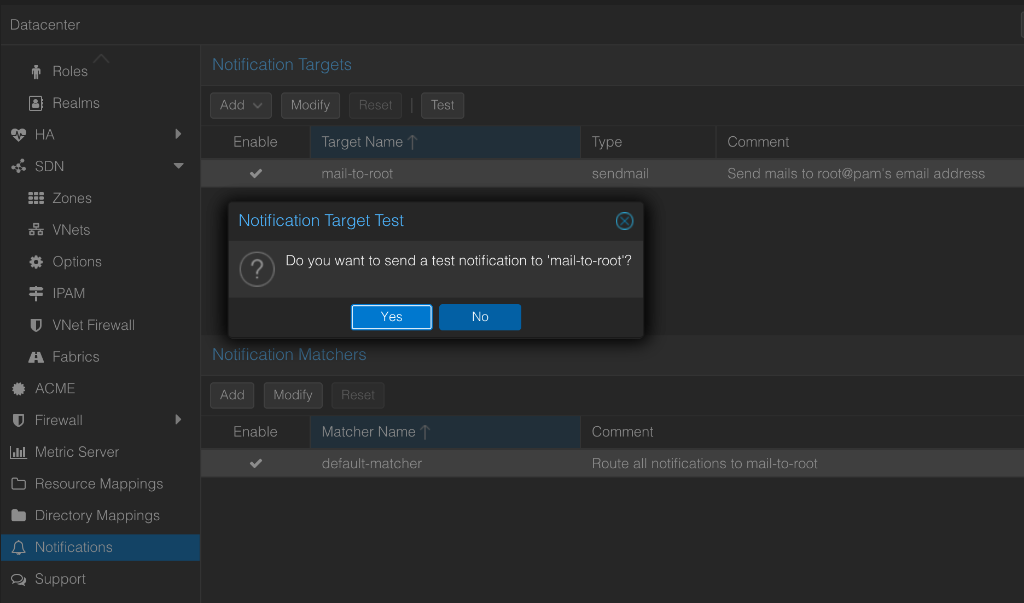
Click Yes to send the test notification. You should see a confirmation:
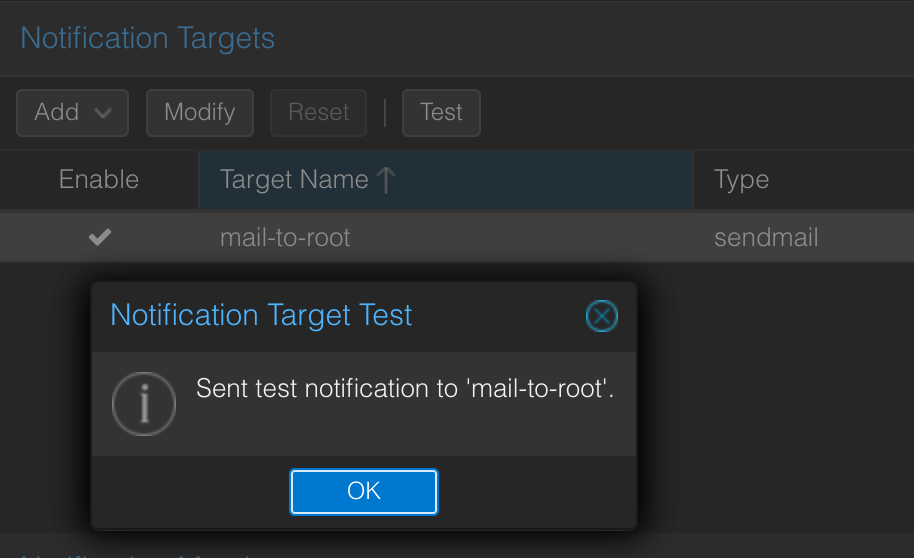
If everything is configured correctly, the email should arrive at the address you set in MAIL_TO.
Verify from the command line
You can also test the full pipeline from the shell:
echo "Test from Proxmox mail API" | sendmail rootCheck the mail log for errors:
journalctl -u postfix -n 50 --no-pagerIsolate script issues
If the alias is not triggering, test the script directly to isolate the issue:
cat <<'EOF' | /usr/local/sbin/proxmox-mail-api
From: proxmox@localhost
To: root
Subject: Direct API test

This is a direct test bypassing Postfix.
EOF
If the direct test works but the alias does not, the problem is in Postfix alias configuration. If the direct test fails, the problem is in your API credentials.
8. Recommended hardening
Credential expiration tracking
Set CREDENTIAL_EXPIRES in the config file to the expiration date of your client secret or IAM access key (format: YYYY-MM-DD). The script automatically checks this on every run and prepends a warning banner to the email body when credentials are within 60 days of expiring or already expired.
Restrict the Graph sender mailbox
In Microsoft 365, use application access policies in Exchange Online to restrict the app registration so it can only send as the intended alert mailbox.
Troubleshooting
| Symptom | Likely Cause |
|---|---|
Config file not found | /etc/default/proxmox-mail-api does not exist. Create it per step 2. |
permissions are 0o666, which allows group or world writes | Run chmod 644 /etc/default/proxmox-mail-api. |
MAIL_PROVIDER must be 'graph' or 'ses' | The MAIL_PROVIDER line is missing or has a typo in the config file. |
Failed to obtain Graph token | Check GRAPH_TENANT_ID, GRAPH_CLIENT_ID, and GRAPH_CLIENT_SECRET. Verify the app has Mail.Send permission with admin consent. |
Graph sendMail failed | The GRAPH_SENDER mailbox may not exist or the app is not authorized to send as that mailbox. |
boto3 is required | Run apt install -y python3-boto3. |
SES send_email failed | Verify IAM credentials, region, and that the sender address is verified in SES. |
| Script works directly but not through Postfix | Verify the alias with postconf alias_maps. Run newaliases and restart Postfix. Check that the script is executable (chmod 755). |
| No email arrives but no errors in logs | Confirm MAIL_TO is correct. Check spam folders. For Graph, verify the message appears in the sender's Sent Items. |