SSH keys can be used for more than just SSH connections to servers. They can also be used to authenticate with services like GitLab and GitHub for git operations (clone, push, pull) without entering a password. This guide walks through generating an ed25519 SSH keypair on Windows and adding it to your GitLab account.
Step 1 — Generate the SSH Keypair
Open a terminal window to your user profile directory. The fastest method is to hit the start button or search bar and type terminal and press Enter.


Run the following command:
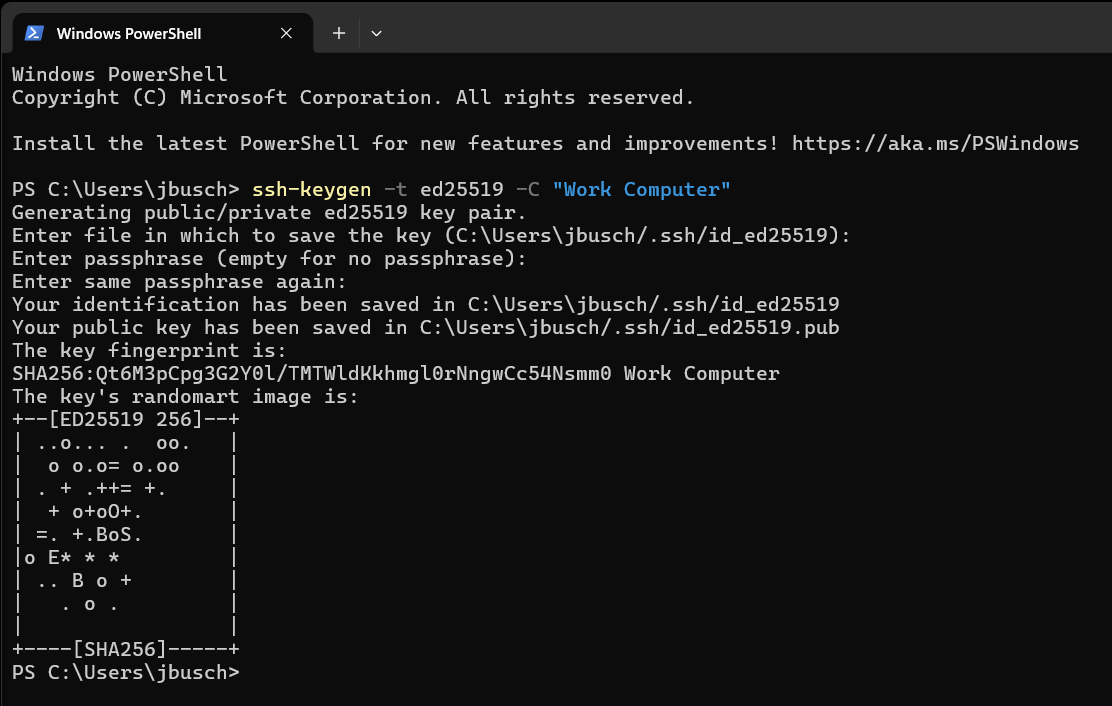
ssh-keygen -t ed25519 -C "Work Computer"- -t ed25519 specifies the key algorithm (ed25519 is modern, fast, and more secure than RSA)
- -C "Work Computer" adds a comment to identify which machine the key belongs to — update this to something meaningful (e.g., "Jared Desktop", "Dev Laptop")
When prompted:
- For a file location, press Enter to accept the default (
C:\Users\<username>\.ssh\id_ed25519) - For a passphrase, press Enter for no passphrase
- To confirm the passphrase, press Enter again
The key pair is now created. You will see output showing the key fingerprint and a randomart image.
What was created: Two files in your C:\Users\<username>\.ssh\ directory:
id_ed25519— your private key (never share this)id_ed25519.pub— your public key (this is what you add to GitLab)
Step 2 — Copy the Public Key
Run the following command to display your public key:
Get-Content "$env:USERPROFILE\.ssh\id_ed25519.pub"
Copy the entire output — it will look something like:
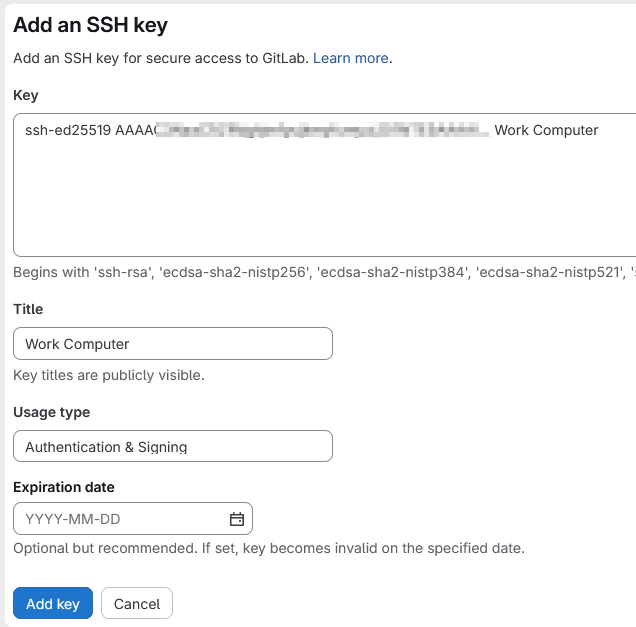
ssh-ed25519 AAAAC3NzaC1lZDI1NTE5AAAAI... Work ComputerThe -C comment you used during key generation appears at the end of the public key. This is how GitLab will auto-name the key when you paste it.
Step 3 — Add the Key to GitLab
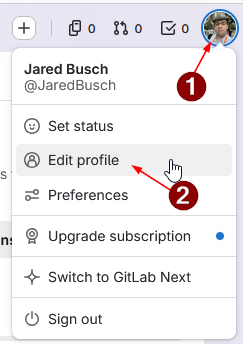
Log into GitLab. Click your avatar (top-right) → Edit profile.
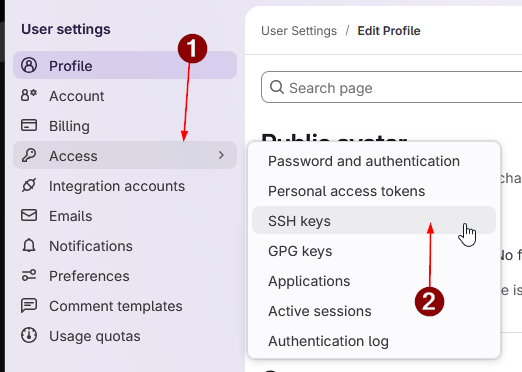
In the left sidebar, go to Access Tokens → SSH keys.
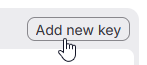
Click Add new key.
Paste your public key into the Key field. The Title will auto-populate from the -C comment you set during key generation. Optionally set an Expiration date, then click Add key.
Step 4 — Test the Connection
Run the following command to verify the key is working:
ssh -T git@gitlab.comIf this is your first time connecting, you will be asked to confirm the host fingerprint — type yes.
A successful connection will display:
Welcome to GitLab, @YourUsername!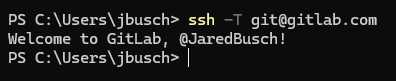
Step 5 — Clone a Repository Using SSH
When cloning a repository, use the SSH URL (not HTTPS). You can find the SSH clone URL on any GitLab project page by clicking the Code dropdown and selecting Clone with SSH.
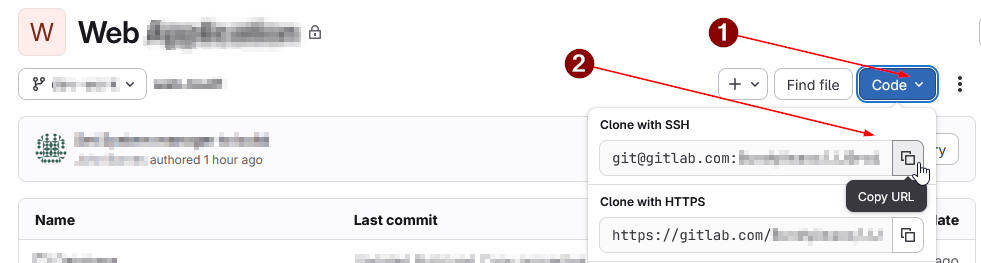
git clone git@gitlab.com:YourOrg/your-project.git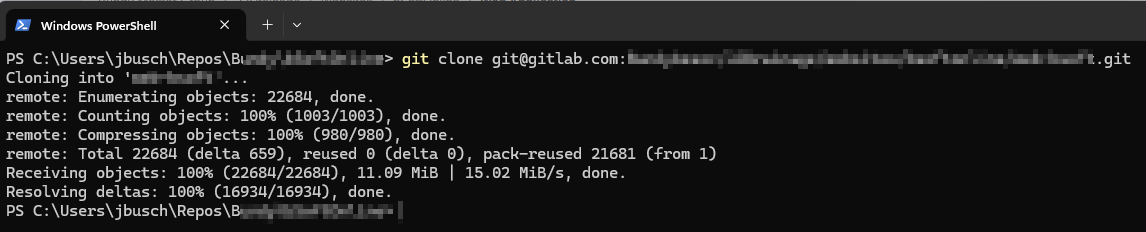
Troubleshooting
"Permission denied (publickey)"
- Verify the key exists:powershell
Test-Path "$env:USERPROFILE\.ssh\id_ed25519" - Verify the public key was added to GitLab (Step 3)
- Verify the ssh-agent is running:powershell
Get-Service ssh-agent - If the ssh-agent service is disabled, enable and start it:powershell
Set-Service ssh-agent -StartupType Automatic
Start-Service ssh-agent
ssh-add "$env:USERPROFILE\.ssh\id_ed25519"
"Host key verification failed"
This means you haven't accepted GitLab's host fingerprint yet. Run ssh -T git@gitlab.com and type yes when prompted.
ssh -T git@gitlab.comMultiple SSH Keys
If you have multiple keys for different services, create a config file at C:\Users\<username>\.ssh\config:
Host gitlab.com
    HostName gitlab.com
    User git
IdentityFile ~/.ssh/id_ed25519If you have multiple keys for GitLab, you will have to manage things yourself. You can alias the host in your config file to use a different key, but then you will have to know and understand how to clone it using that alias. That process is beyond the scope of this guide.